Outlook 2016: Clear the Auto-Complete E-mail Cache
This article has not been updated recently and may contain dated material.
Clearing the Outlook 2016 Auto-Complete Cache (E-mail Cache)
How to Clear Out Individual Entries:
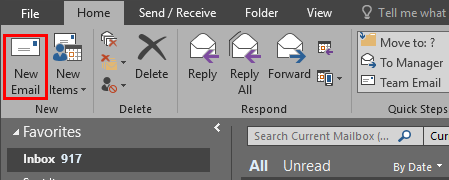
1. In the Outlook main window, start a new email by clicking the New Email button.
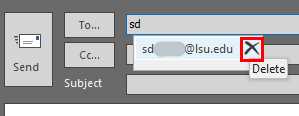
2. In the new email To field, start typing the email address or the name of the contact you would like to clear from the Auto-Complete cache. It appears listed in a tool-tip.
3. Press the down arrow key to select the right contact if there is more than one proposed.
4. Click the delete (X) icon next to the suggestion to permanently remove the Auto-Complete entry.
How to Clear the Whole Auto-Complete Cache:
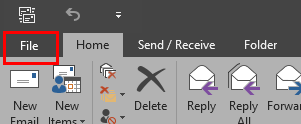
1. In the Outlook main window, click the File menu.
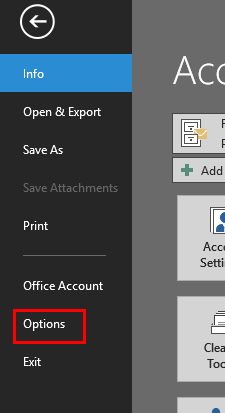
2. From the File menu, click the Options button.
3. In the Options, click the Mail tab and scroll down to the Send Messages section.
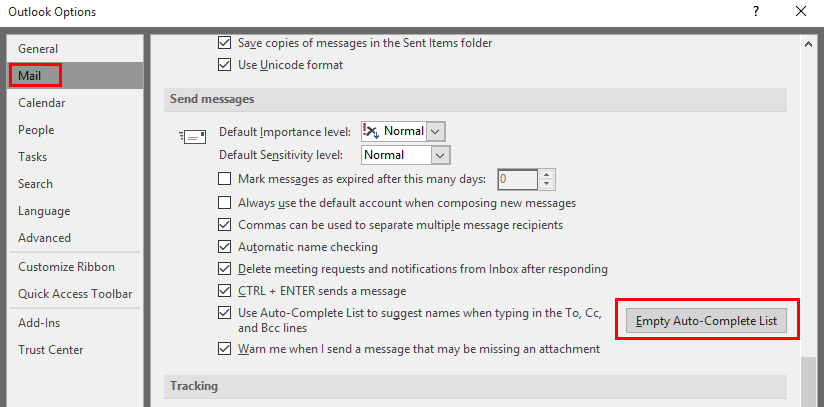
4. Click the Empty Auto-Complete List button.
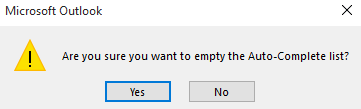
5. A confirmation box will appear, click Yes. The Auto-Complete cache will be completely erased.
Referenced from: support.office.com
18029
11/15/2024 10:26:49 AM