Moodle: Editing a Section
This article has not been updated recently and may contain dated material.
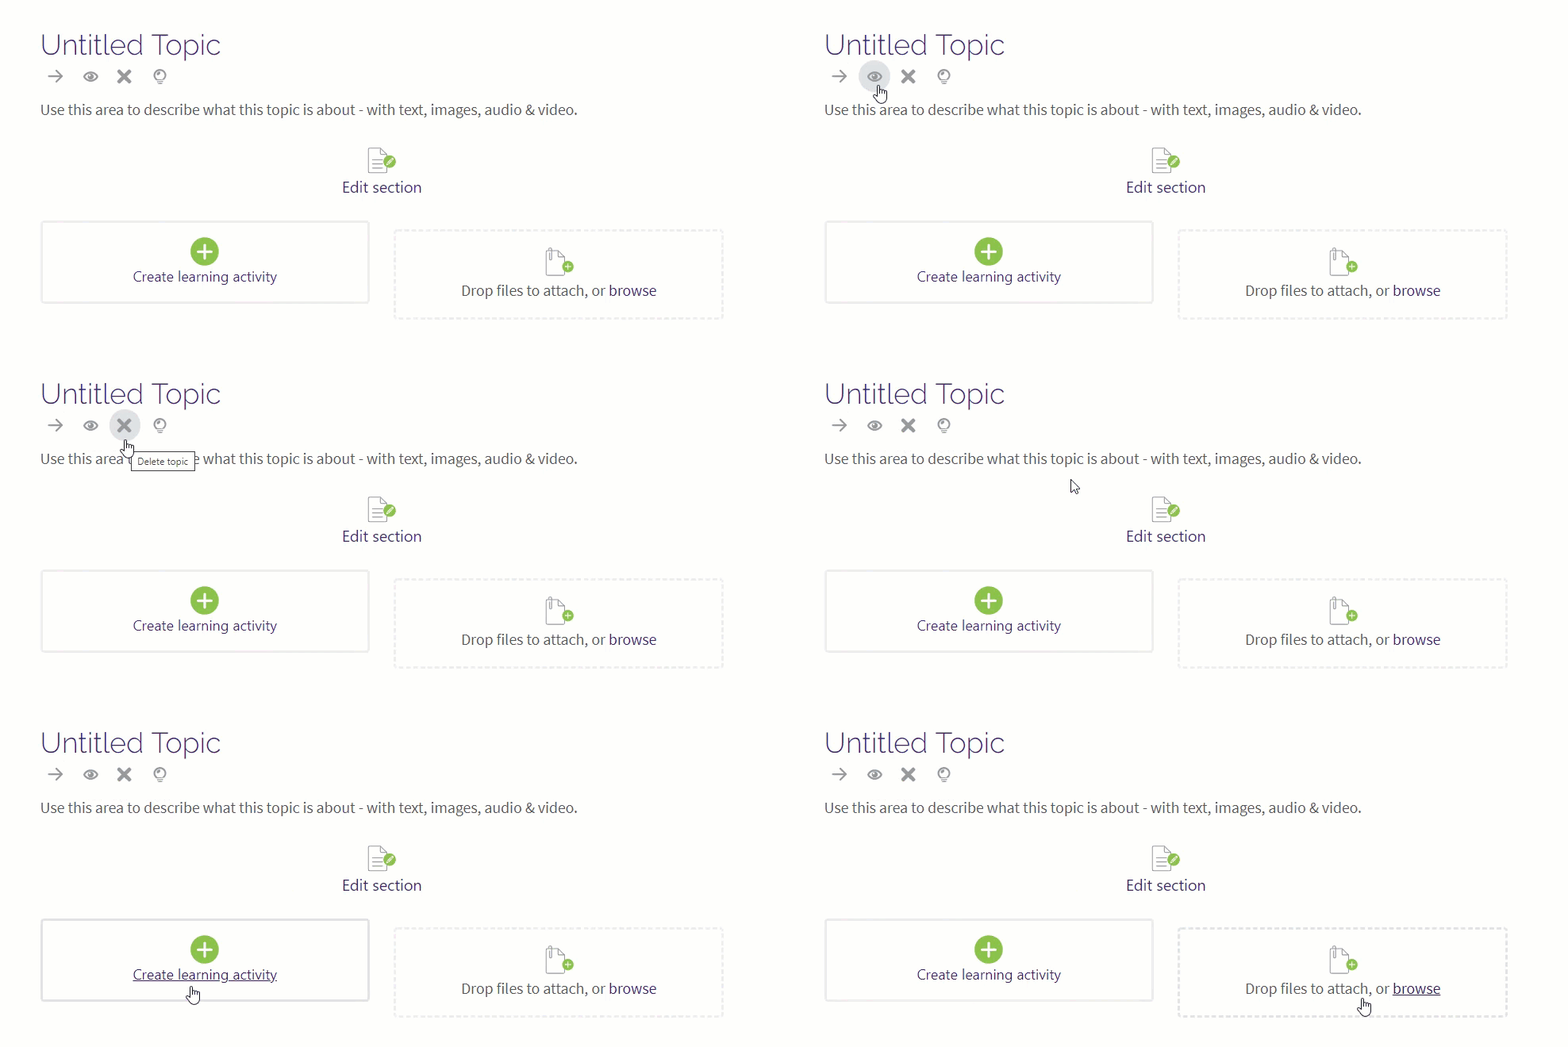
Moodle is always in "edit mode" for those with editing permissions, such as an instructor. In each section, also known as topics, modules, or weeks, there are several options to add or edit content, and rearrange, delete, or hide content. The animation below shows the location of these functions, but they are also described in the text below.

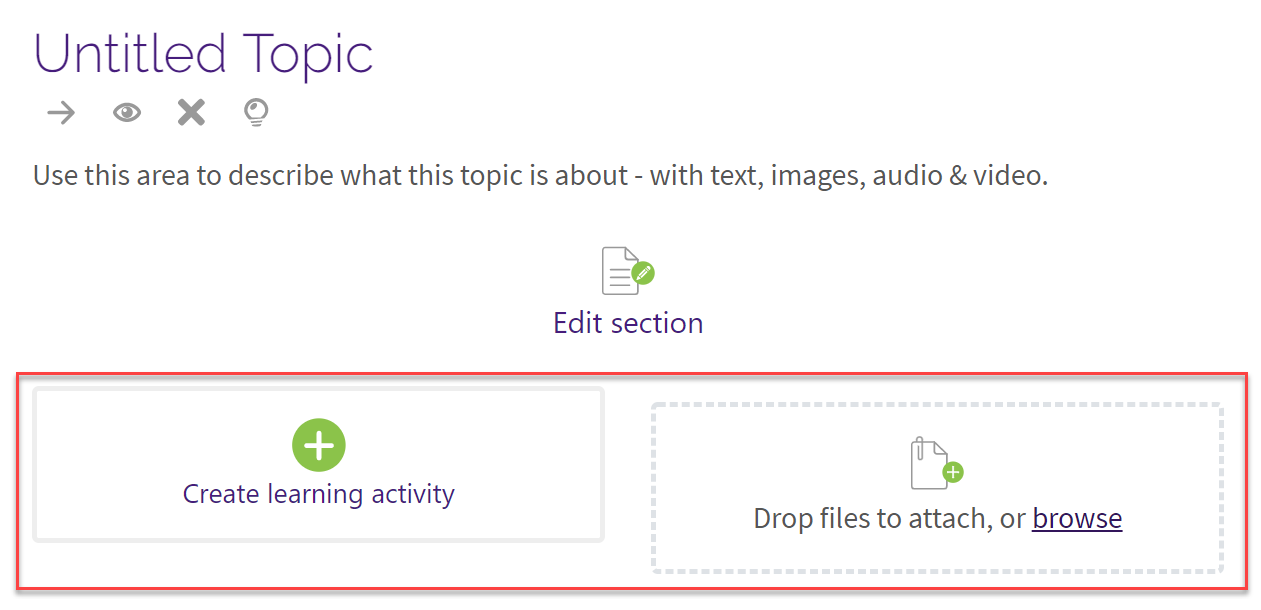
Under the section title, there are four features: move, hide/show, delete, and highlight.
- The "arrow" button is the move function. This allows you to rearrange the order of sections in the Table of Contents (located on the left of the course page).
- Click the arrow button, and then select the section from the Table of Contents that you want to be after the section you move.
- Click the green plus (+) button to place the section before (ahead) of the selected section.

- If you wish to cancel this action, click the cancel (X) button at the bottom of the page.
- The "eye" button is the hide/show function. This allows you to hide the entire section from students — including all the activities and resources contained in the section.
- Click the eye button, and it will change to an eye with a slash through it. The title will appear gray, and you will see a note that the section is hidden from students. In the Table of Contents, you will also see this message, along with a red dot. Students will see the title of the section, but that it is unavailable.

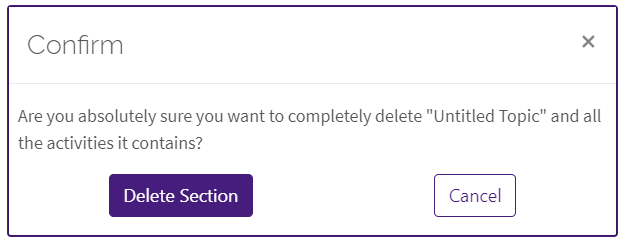
- The "X" button is the delete button. It allows you to delete the entire section — including all the activities and resources contained in the section. These items will move to the recycle bin for a short period of time, before being permanently deleted.
- Click the X button to delete the section. You can either confirm or cancel this action.

- The "lightbulb" icon is the highlight feature. This allows instructors to highlight a section for students. When a section is highlighted, students will see that section first upon accessing a course. You will know a section is highlighted when you see "current" listed below the section title.
Note: Courses that are set to a "weekly" format will automatically highlight the current week. Only one section (week) can be highlighted at a time.

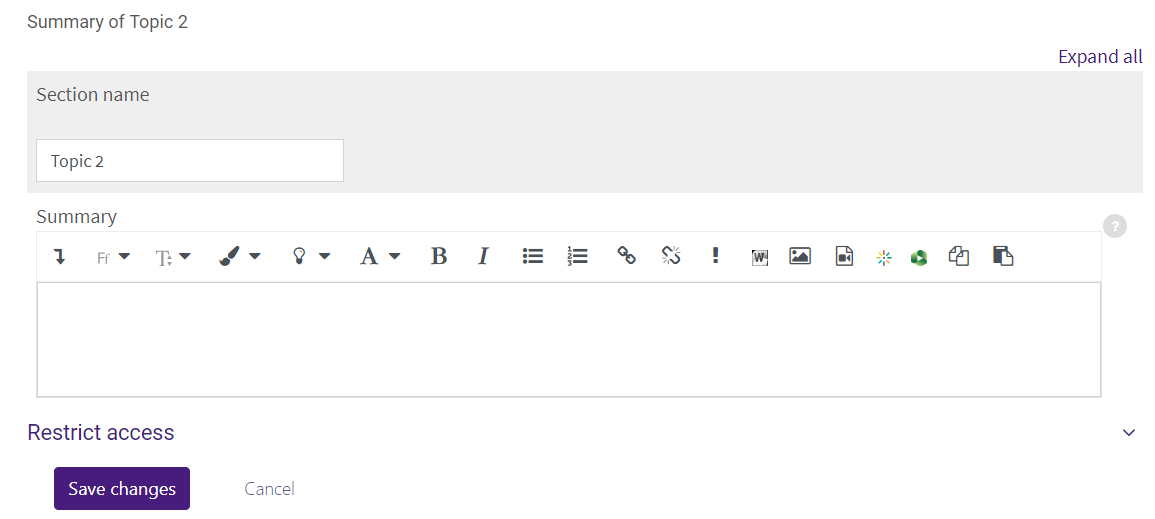
You can also click on the Edit Section to add a description and information to the section summary.
- Click on the "Edit Section" link under the section title
- In the Section Summary, you can customize the section title, add information in the summary, and save or cancel your changes. If you want to restrict access to the section, you can do that as well (prior to saving).

Below the section summary, you can use the Create a learning activity or add files by either browsing or dragging/dropping files from your computer. For more information on the types of learning activities you can add to a course, see GROK article 20159.

20219
6/27/2024 1:20:35 PM