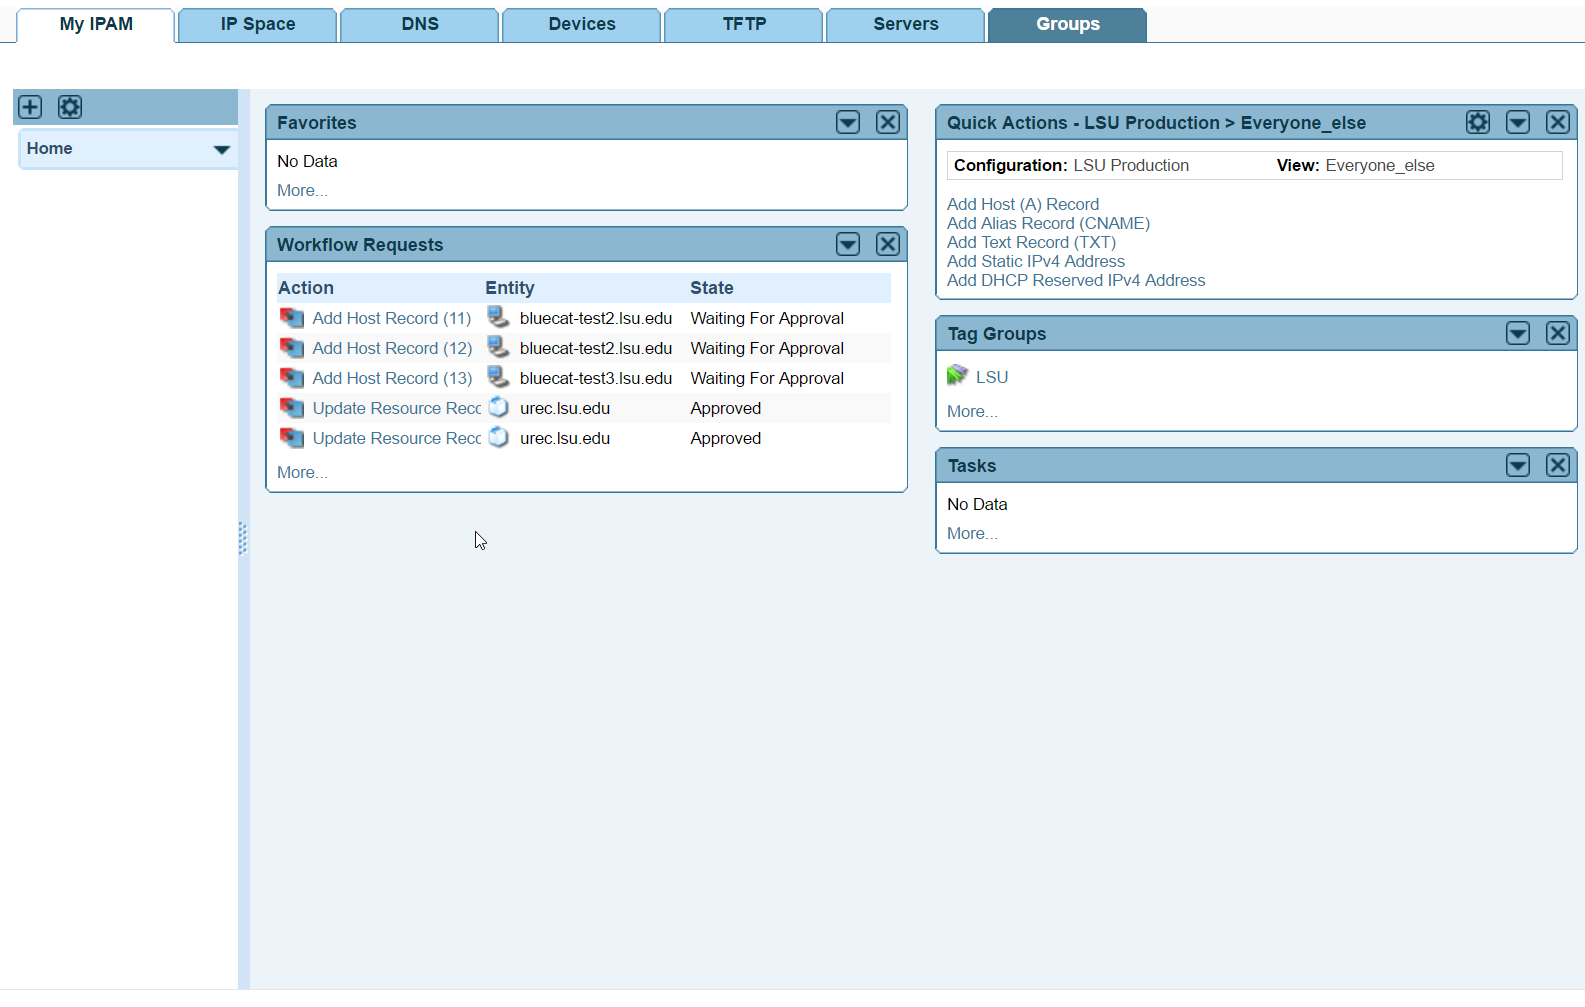
BlueCat Address Manager: My IPAM Quick Actions
The My IPAM Quick Action widget allows the quick creation of A (host) records, CNAME records, and fixed DHCP reservations.
The My IPAM page is the starting point for working with Address Manager. You can create tabs to sort and organize your Address Manager links and functions. For example, you can create tabs to represent the structure of your organization or to group and organize network management tasks and functions.
The My IPAM page features customizable tabs and widgets. Widgets are containers that provide access to Address Manager functions including Favorites links, Tag Groups, Tasks, Workflow Requests, Server Statistics, and Quick Actions.
- You can add any number of widgets to any of the tabs on your My IPAM page. You add widgets and position them on the page by dragging and dropping them into place. Address Manager helps you arrange your widgets by providing columns and placement guides on the tab.
- Quick Actions Widget - displays a list of commonly performed tasks including, Add DHCP Reserved IPv4 Address, Add Host (A) Record, and Add CNAME. Instead of requiring you to navigate through a hierarchical object tree to perform a task, you can quickly perform any of these tasks from the My IPAM page.
To add the Quick Action widget to a tab:
1. Select the My IPAM tab. The My IPAM page displays the Home tab and widgets.
2. Select the tab to which you want to add a widget.
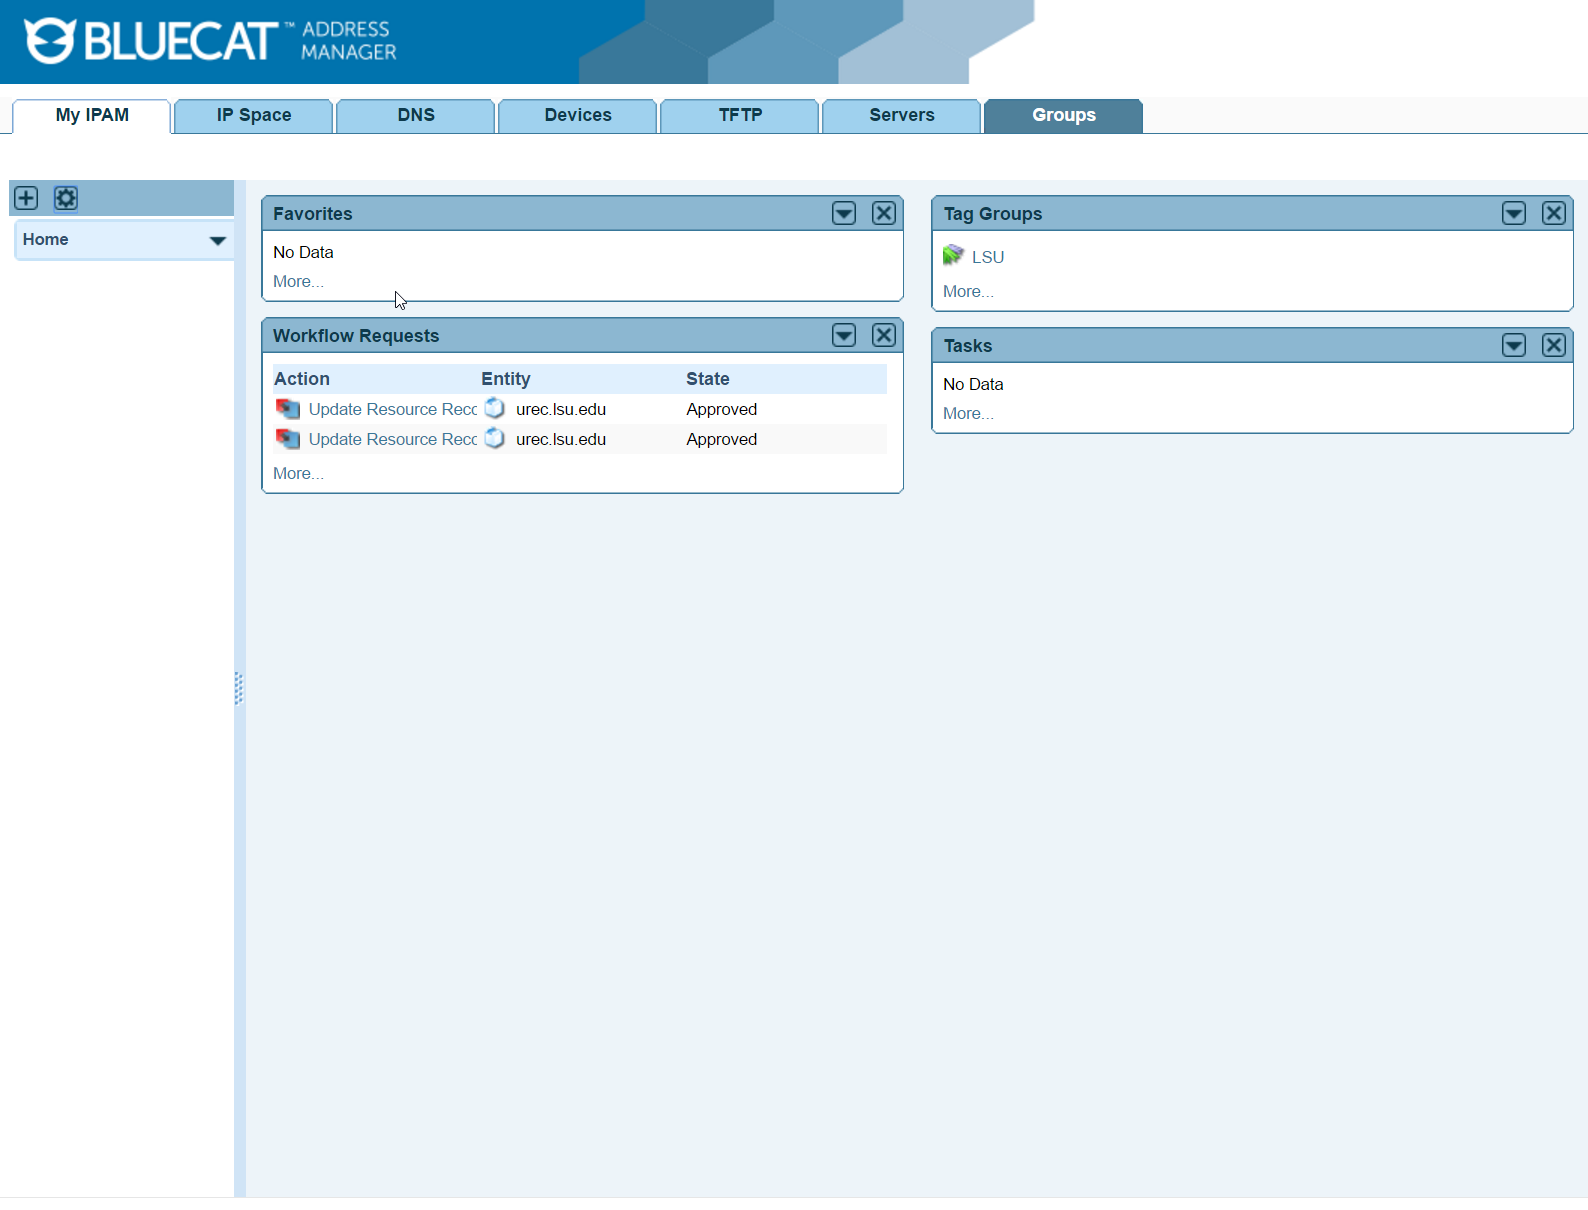
3. Click the Add Widget button in the top left corner of the My IPAM page. The widget selectors appear.
4. Click on the Quick Actions widget selector then drag and drop it into the main tab area. A blue outline appears to help you position the widget in one of the columns on the tab. If no outline appears, hover over an existing widget on the tab and the placement outline appears.

5. After you add a Quick Actions widget, you need to select the "LSU Production" configuration and "Everyone_else" view. Click Save. All tasks launched from this widget will inherit the configuration and view you have selected.
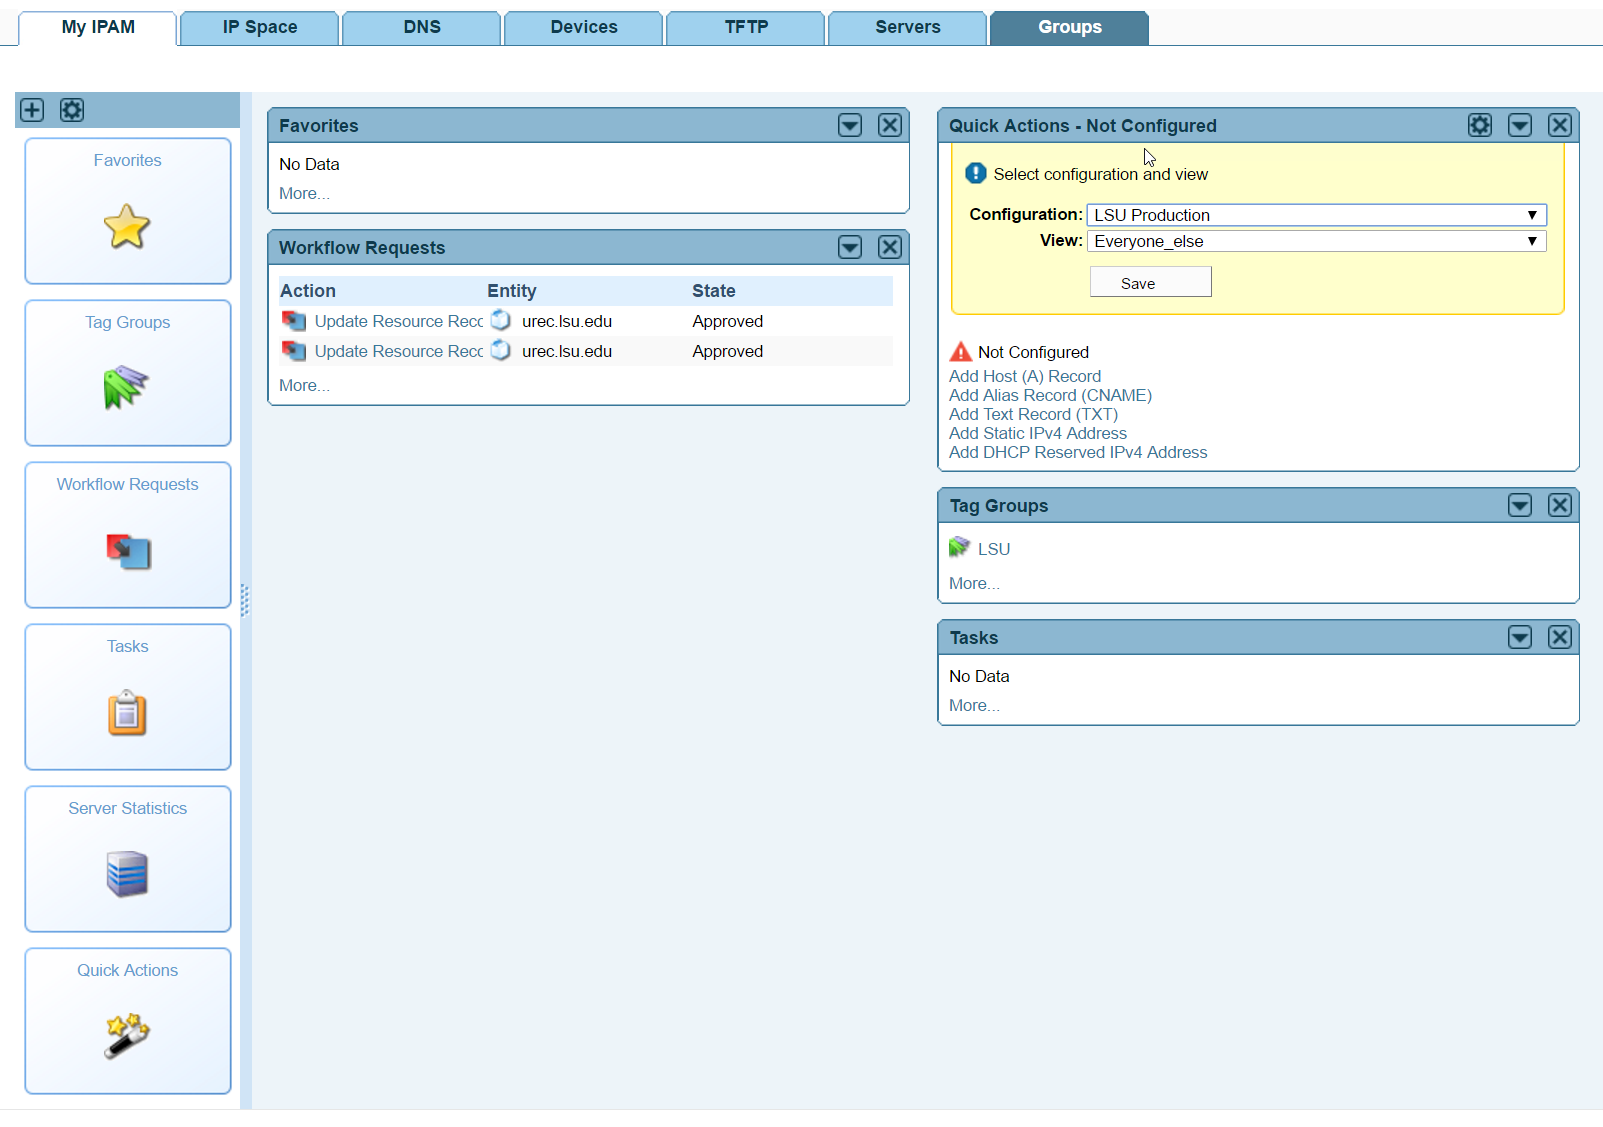
6. The Quick Actions widget should now be configured.

Adding a DHCP Reserved IPv4 Address
The Add DHCP Reserved IPv4 Address widget allows you to quickly add DHCP reserved IP addresses to a specific network.
To add a DHCP Reserved IPv4 address:
-
From the Quick Actions, widget click Add DHCP Reserved IPv4 address.
-
The Add DHCP Reserved IPv4 address panel appears.
-
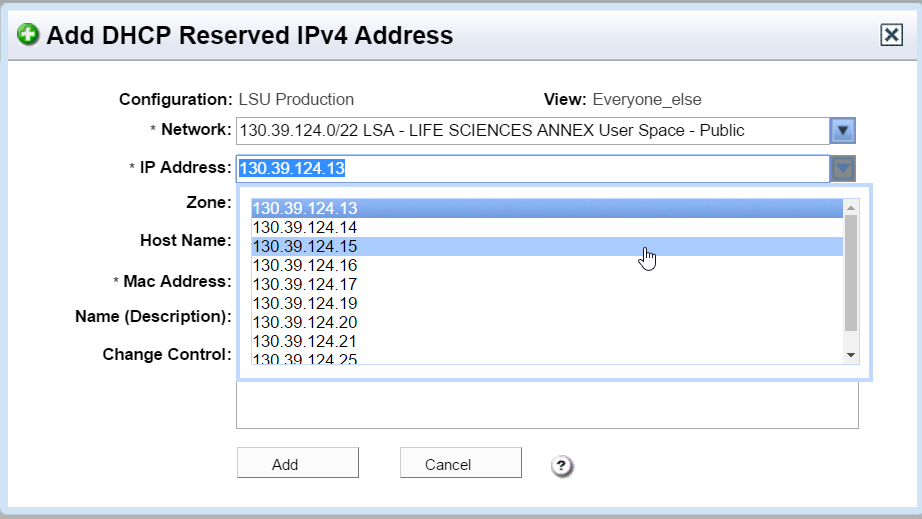
In the Network field, type or choose the network to which you want to add an IP address. The quickest way to navigate to the intended network is to first type in the building code. The drop-down menu will show all networks available in that building code.
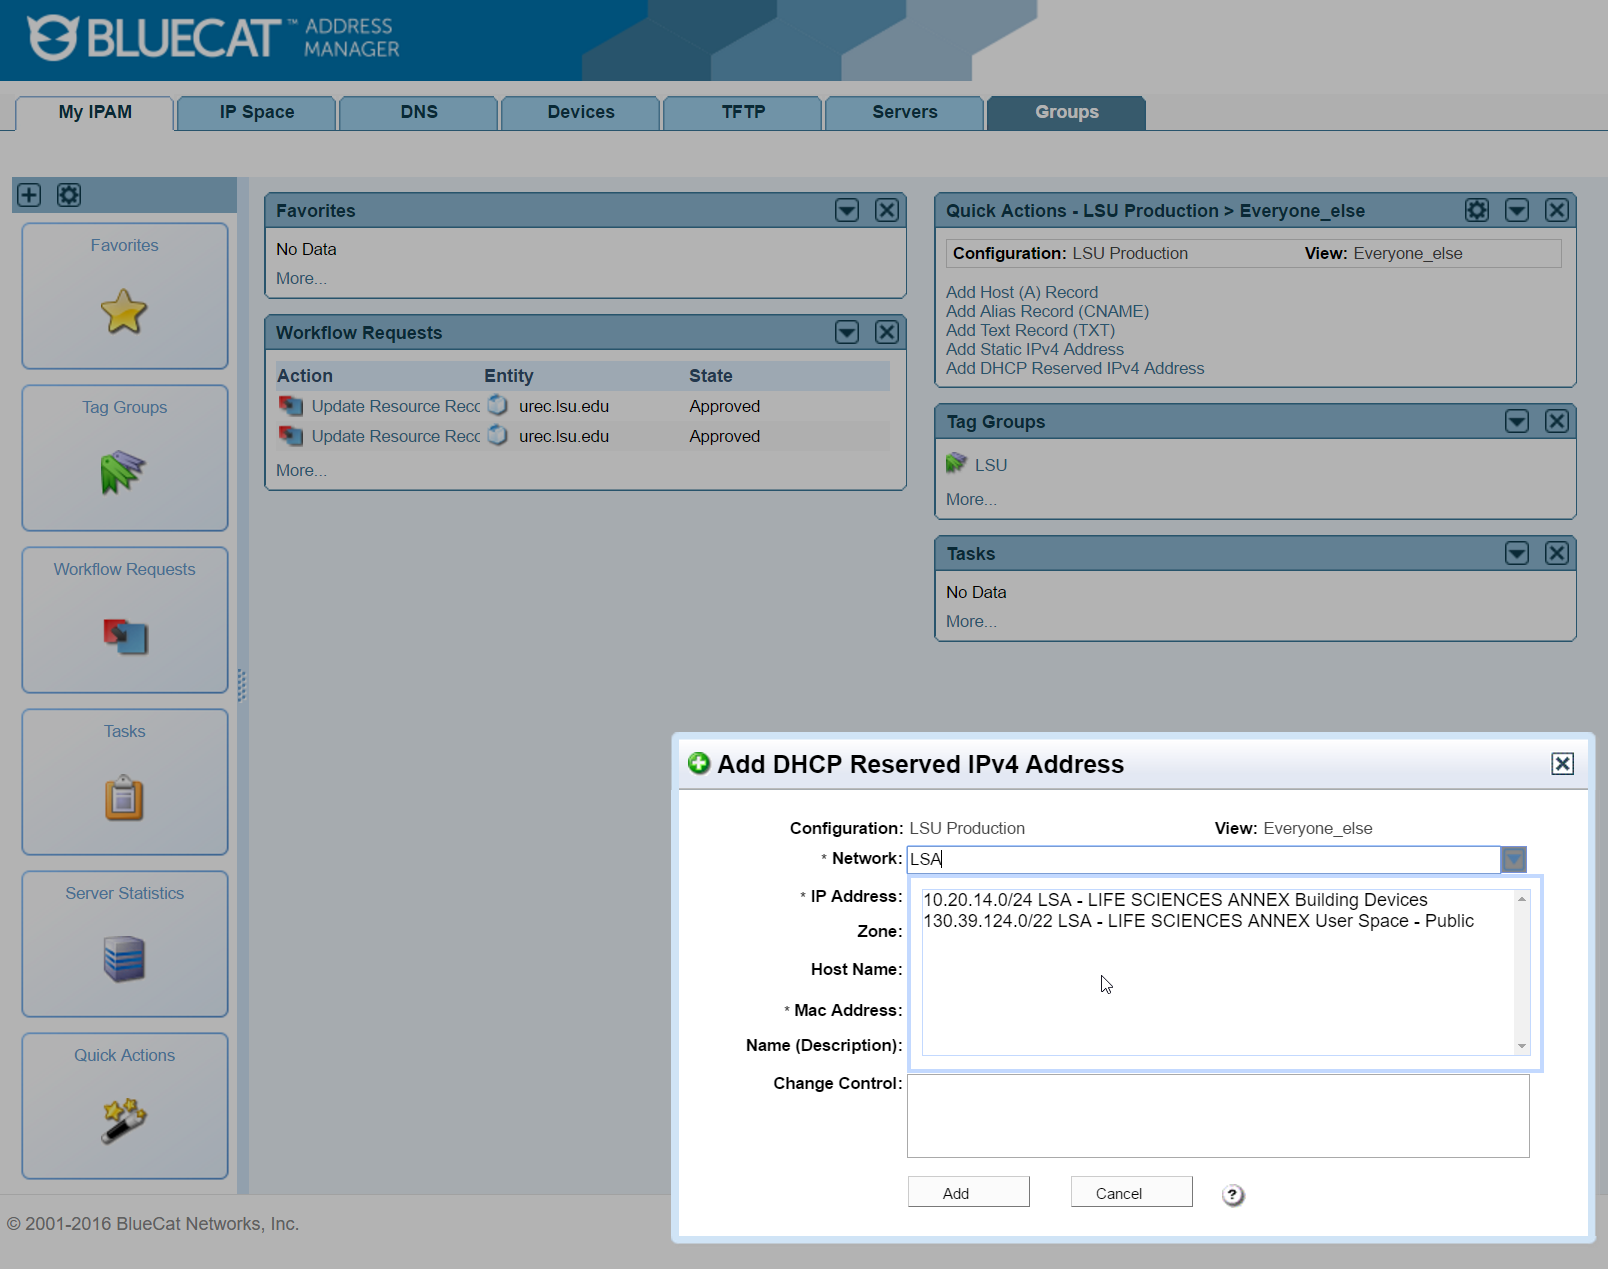
- In the IP address field, type or choose the IP address. The menu will display the next ten available addresses. IP addresses which are part of a pending workflow request are not displayed.
- In the Zone field, type lsu.edu or choose a subdomain of lsu.edu.
- In the Host Name field, type the hostname you wish to add.
- In the Mac Address field, enter the MAC address of the device to which the IPv4 address belongs.
- In the Name (Description) field, enter the name of the device to which the IPv4 address belongs.
- In the Change Control field, enter the reason for the reservation (if required).
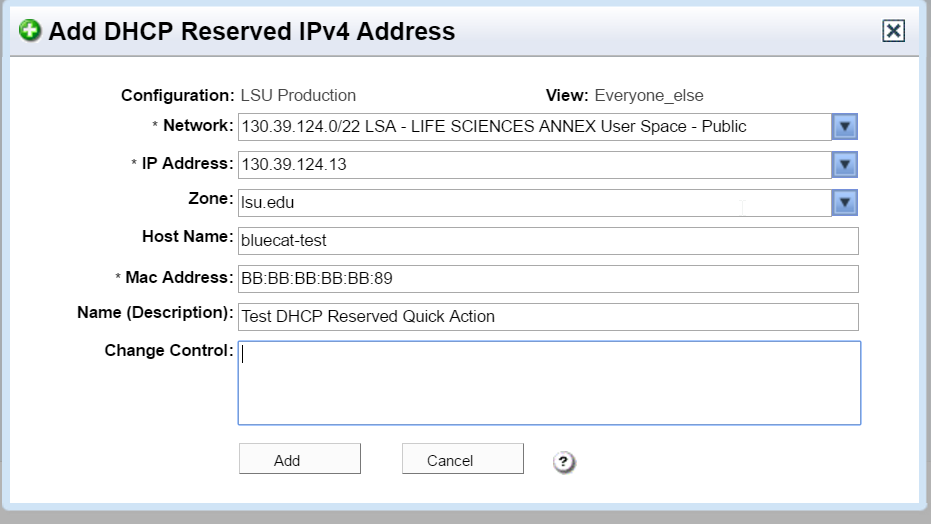
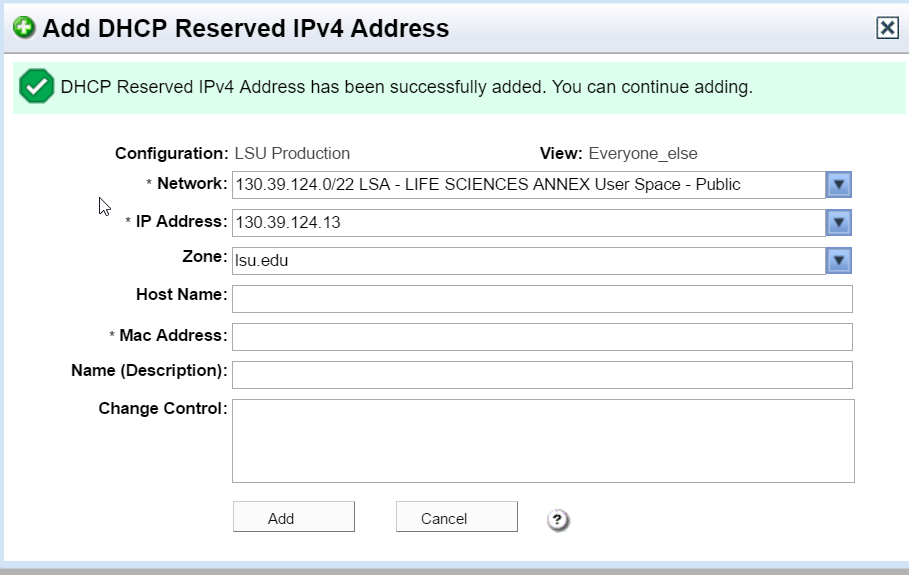
- Click "Add" to save and add the IP address to the network or click "Cancel" to exit the Quick Action.
To add host (A) records:
From the Quick Actions widget, click Add Host (A) Record.
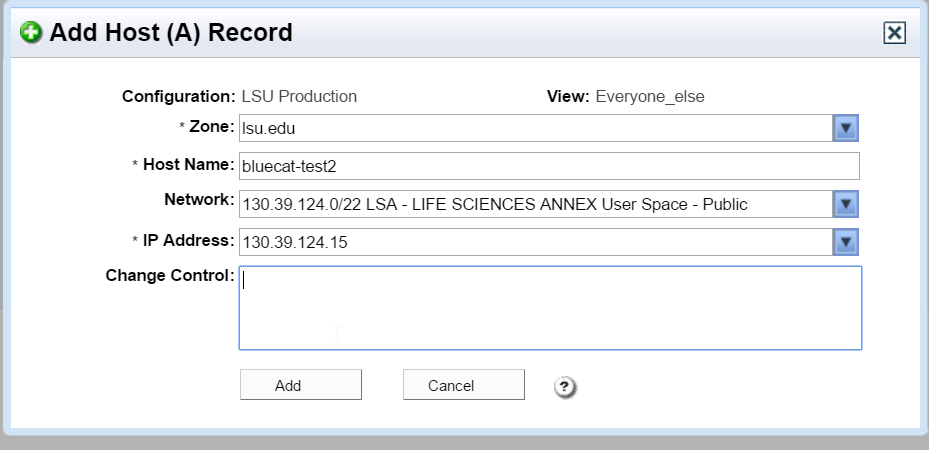
The Add Host Records panel appears.
- In the Zone field, type or choose the zone (lsu.edu or subdomain) to which you want to add the host record. You will only be allowed to select zones to which you have been granted access.
- In the Hostname field, type the hostname you wish to add.
- In the Network field, type or choose the name of the network to which the host will belong.
- In the IP address field, type or choose the corresponding IP address.
- Under Change Control, optionally add comments to describe your changes.
- Click Add to save the host record and add another record. Click Cancel to exit the Quick Action.
To add alias (CNAME) records:
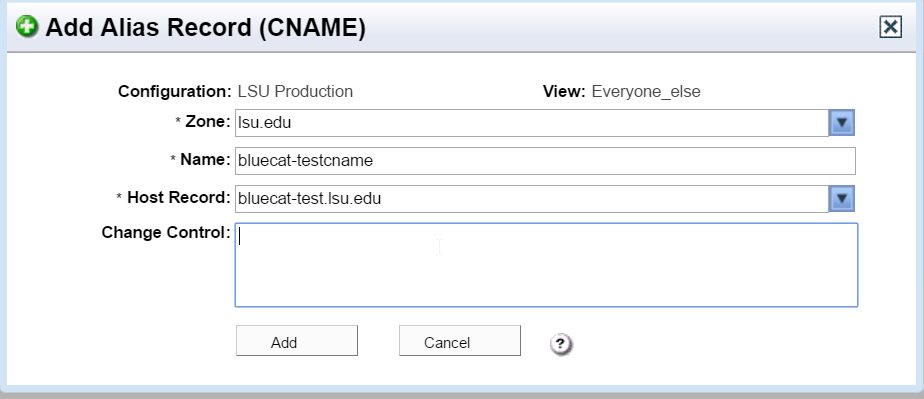
In the Quick Actions widget, click Add Alias Record (CNAME).
The Add Alias Record (CNAME) panel appears.
- In the Zone field, type lsu.edu or choose the subdomain to which you want to add the alias record. You will only be allowed to select zones to which you have been granted access.
- In the Name field, type the name for the alias record.
- In the Host Record field, type or choose a host record from the drop-down list. External Hosts will also appear in the list. You can only choose host records in lsu.edu that have already been approved and are visible in the Everyone_else view. To check pending approvals please refer to the Workflow Requests Widget.
- In the Change Control field, optionally type a description of the changes you have made.
- Click Add to save the alias record and add another record. Click Cancel to exit the Quick Action once done.
Workflow Requests Widget
The Workflow Requests widget shows workflow change requests.
The widget shows change requests that you have made.
To view change request details, click a link. To view all of your change requests, click More...
Any DNS record created in the lsu.edu zone will require approval. Any DNS record created in a lsu.edu subdomain will not require approval. You may check the status of any record that is awaiting approval in this widget. Once a record has been approved it will be available through DNS query and will be available for use in different areas of the address manager (ex. Add Alias Record - choose Host record).
