OSFMount: Mounting a ISO- Windows
This article has not been updated recently and may contain dated material.
Mounting an Image with OSFMount:
1. Open the application.
2. From the home screen of OSFMount select Mount new.

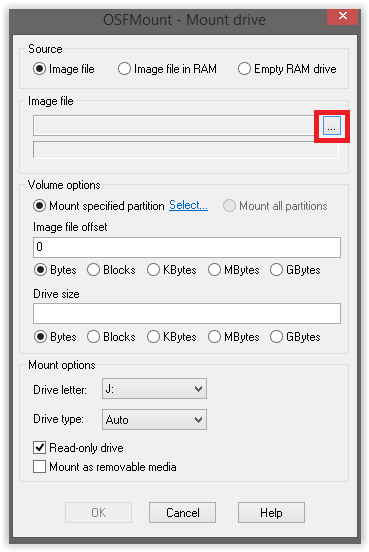
3. Under Image file, select the box [...], to find your ISO file. (OSFMount can also deal with other files as well).
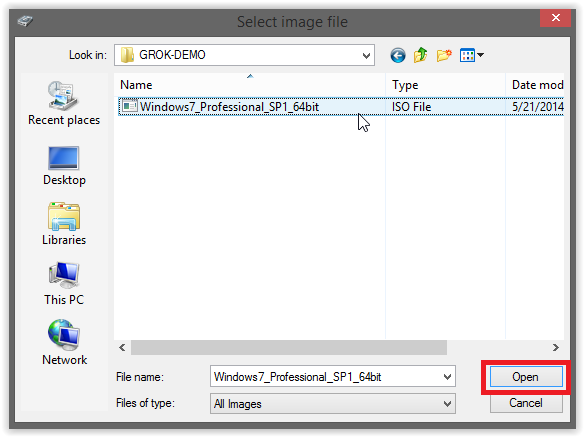
4. Locate your ISO File on your computer and select Open.
5. Press OK (On the Options screen its optional but it is possible change the Driver letter as well as Drive type under Mount options below).

6. After a few seconds (maybe less) the ISO image will be mounted onto the computer as a virtual drive.
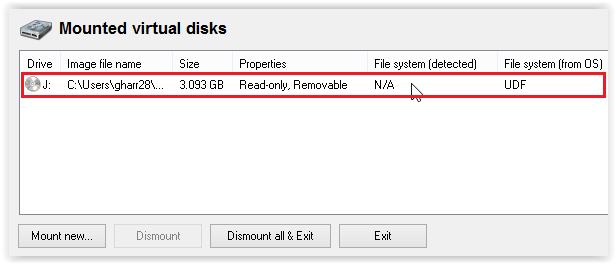
7. Double click on the Image file name from the OSFMount home screen.
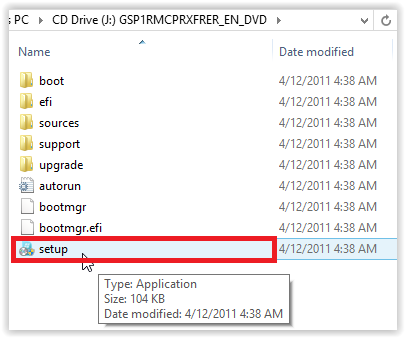
8. The file is now mounted and available on your computer. (From here you can run the setup application of your program).
NOTE: To deleted all virtual drives created, select Dismount all & Exit after running the program.
Referenced from: Passmark
17465
11/7/2023 9:40:46 AM