To Install JMP on Windows
1. Go to TigerWare (login if you do not see the downloads available).
2. Click to download both the available files for JMP Pro.
Note: If you are having trouble downloading the SID file, either try right-clicking the link on Tigerware then choose Save File As..., or if the text file is open in your browser already, press Control + S to save the file.
3. If prompted, Save File and Yes to allow changes to be made to the computer.
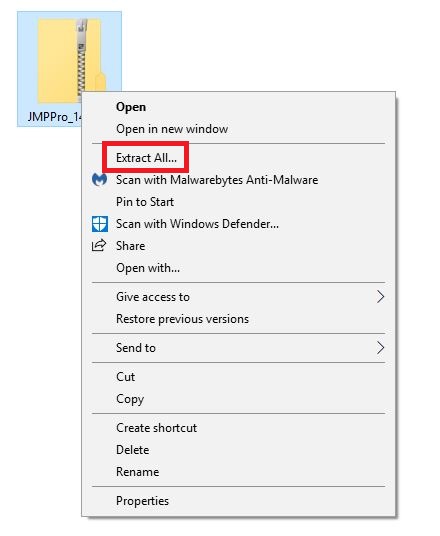
4. Upon completion of the download, right click on the zip file and select Extract All.
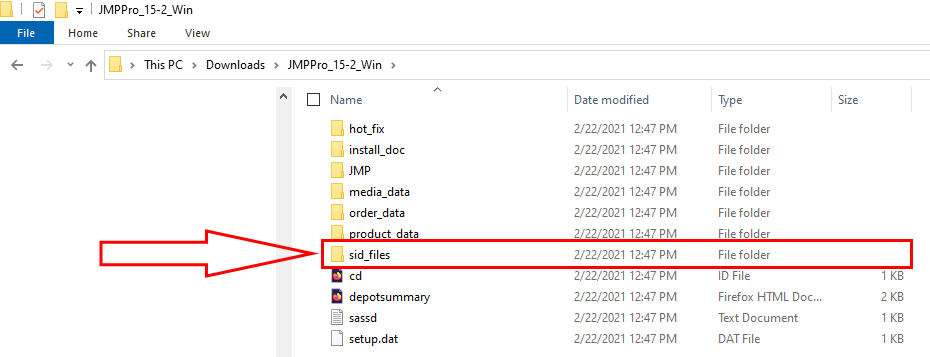
- Make a note of the current folder you are in as well, since you will need the SID file later.
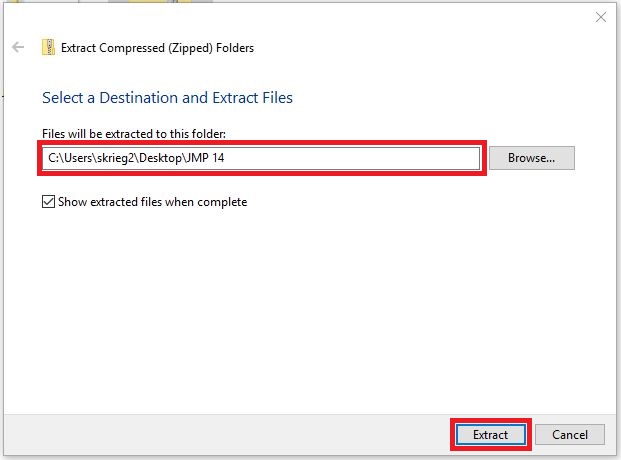
5. Select a destination location for the unzipped files, then click Extract.
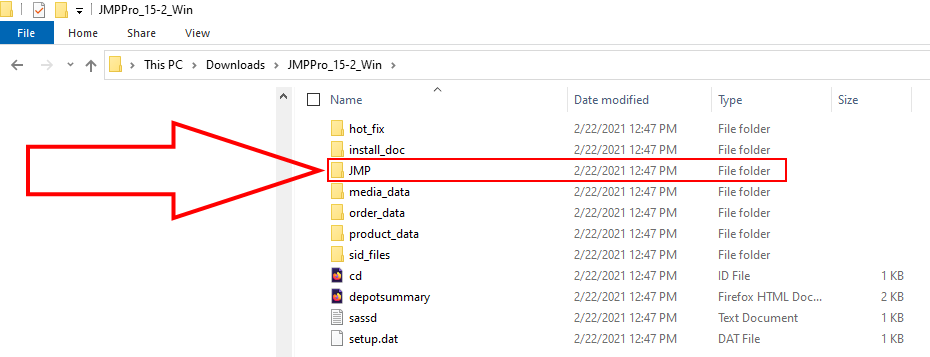
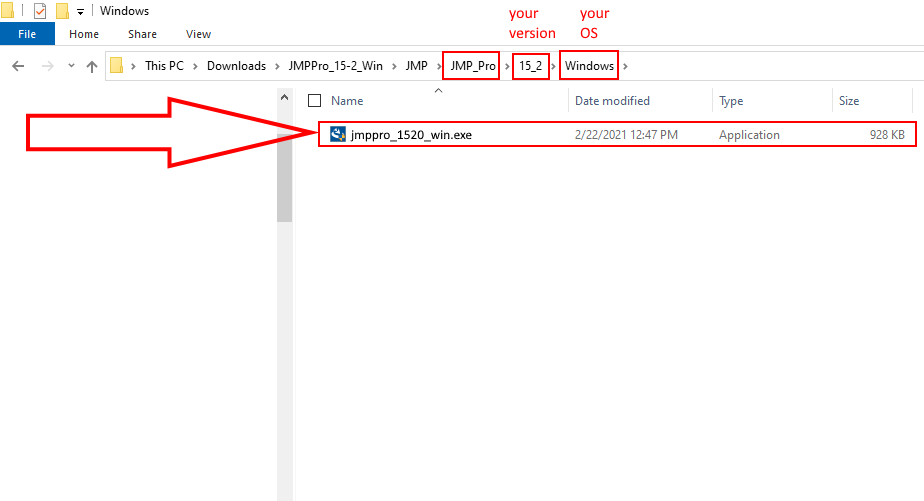
6. Navigate to the unzipped folder in your File Explorer and right click the application setup file called jmppro_[version]_win, or jmppro_[version]_win.exe.
NOTE: Your folder may extract to a default location, or to a custom folder you select. If you are having trouble finding your setup file, please try the following example location on Windows as a guide: C:\Users\[yourusername]\Downloads\JMPPro_15-2_Win\JMP\JMP_Pro\15_2\Windows\
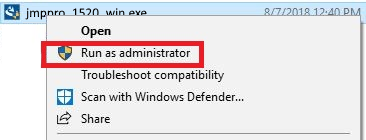
7. From the context menu, select Run as administrator.
8. If prompted, select Yes to allow changes to be made to the computer, allowing the InstallShield Wizard to launch.
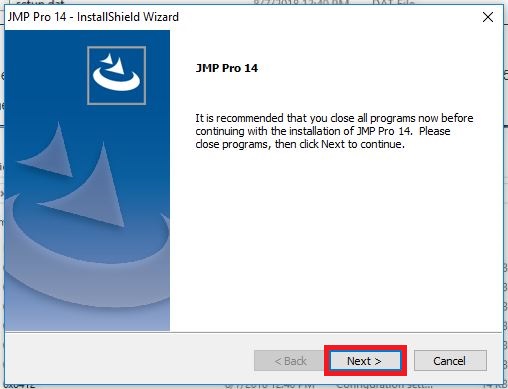
9. Close all unnecessary programs, and select Next.
10. Select the destination folder for file installation, click Next. The default location is: C:\Program Files\SAS\JMPPRO\15 (the number may be different depending on which version is available on Tigerware).
11. Select the features you desire installed, click Next. For expanded information on these features, visit JMP's Website.
12. The InstallShield Wizard is now ready to begin installation. Select Install to begin the process.
13. Upon completion of installation, select Finish to end the process.
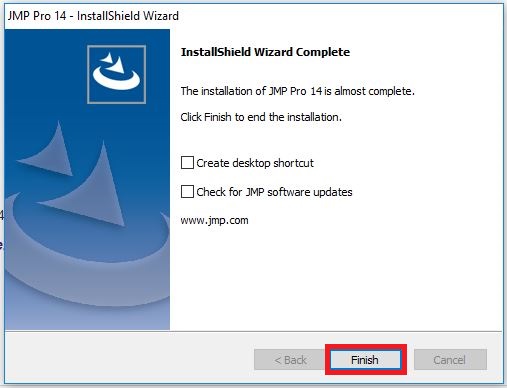
14. Prior to launching JMP Pro, you may be prompted to restart your computer. You can choose to do so immediately, or at another time. Regardless of your selection click Finish to complete the setup and close the InstallShield Wizard.
15. To launch JMP, navigate to the directory you selected in step 10 (e.g. C:\Program Files\SAS\JMPPRO\15) and right-click JMP or JMP.exe. Then select Run as Administrator.
16. When JMP requests the license file, click Open License.

17. Find the original place you downloaded the zip & separate SID file, and select the SID file from there. If you do not remember where it was downloaded, you can go back to Tigerware and re-download it, noting the folder location at the top before you click Save. Then, select the SID file from that location.
18. The application will now ask you to save a file called jmp.per. It does not matter where you save it as long as you do not delete it. Most users can simply click Save.
19. Installation is complete (register if you care to do so).
20. If you have any trouble completing the steps above, please first make sure you have run the program as administrator (right click, then choose Run as Administrator).
- If you have tried this and still need help, please reach out to the Service Desk for further assistance via servicedesk@lsu.edu or call 225-578-3375.
Referenced from JMP Statistical Discovery.